We Were Here Walkthrough Guide
GUIDES
Verifi
6/5/20246 min read
Here is a walkthrough for the game We Were Here. This is a short and fun co-op puzzle game. Grab a friend and get ready.
Here is a list of the different chapters if you want to skip to a certain section:
Storage Room - Between the Eyes:
The Explorer needs to go left and walk to the other side of the room. Pick up the walkie talkie on the the table. Now turn around and there will be a wall with 2 pillars on either side with eyes on them. On that wall will be some symbols in chalk.
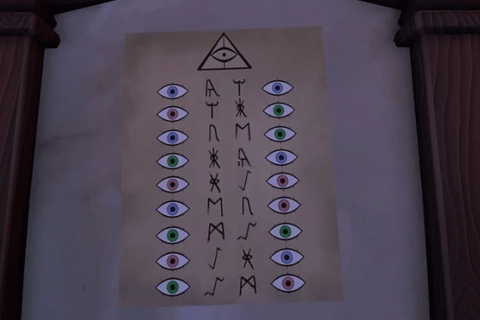
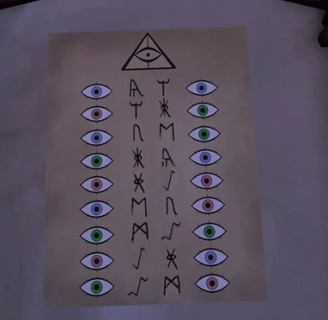
The Librarian should have a piece of paper nearby that has a series of colored eyes with symbols. Communicate with the Explorer which pair of eyes they are seeing and give them the appropriate pair of symbols. The Explorer should then interact with those 2 symbols.
This will open a door in the middle of the room and that will be it for this level.
Painting Room:
The second level requires the Explorer to place a series of symbols underneath the painting they see. They need to communicate to the Librarian which painting they are seeing and the Librarian needs to give them the 3 symbols that go with it.
Submerged Hallway:
The Librarian has to go into the room lead to by some red pipes. Walk down the stairs and you should see a flooded basement. The Explorer will have to give you more information.
The Explorer needs to go into the next room that just opened up and complete the puzzle before the timer runs out. Walk down the stairs and let the Librarian know what color is spelled out above the locked door.
The Librarian now has to turn the 2 valves that will make the color given. As a reference, Red and Yellow make Orange, Red and Blue make Purple, and Yellow and Blue make Green.
If you have done this correctly, the door will open and you will have cleared the level.
The Dungeon:
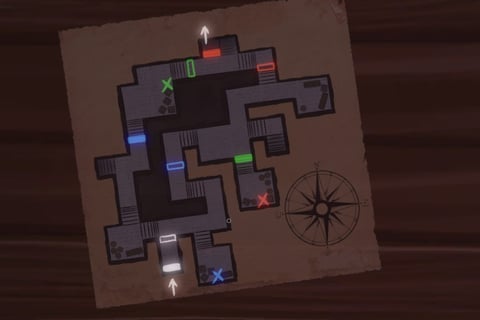
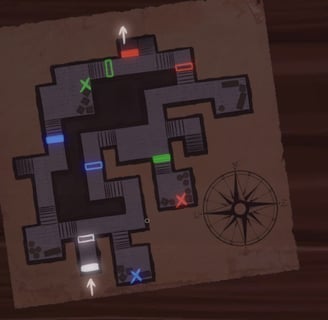
This next challenge can be confusing so be sure to read carefully. Use the map below as a reference.
The Explorer should walk through the door and continue through a second door until they reach a white gate. Pull the white lever next to it, go through the gate, then pull the lever again.
Now that you are in the main corridors of the dungeon, you have to pull the different colored levers in the following order: blue, green, blue, red, blue, green. You should be able to advance to the next room now. Follow the map to guide you.
Note that there is a secret achievement in this level. If you want to get it, note that this will mean that you won't be able to get the Die Hard achievement or the Dungeon Master achievement on this particular playthrough.
For those that want to get the achievement, it requires you to pull the red lever over and over again until confetti pops out. Then make sure the lever is pointing downwards when you get it so you can proceed.
Frozen Courtyard - Chess:
This section is timed and the Explorer has to complete the puzzle before the time limit or they will freeze to death.
The first they need to do is turn on the generator. As soon as you enter the area, make a right and interact with the generator and stop the needle in the green. When this is done, the lights will turn green, now to the left of the generator is a handle that needs to be turned. The generator will now be on.
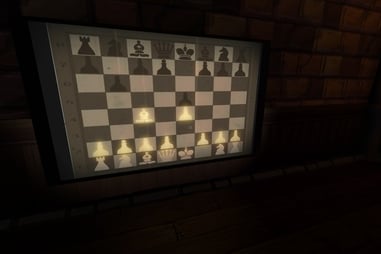
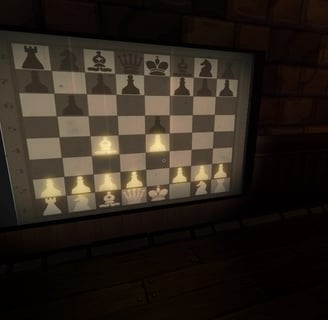
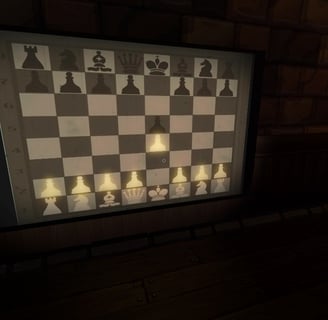
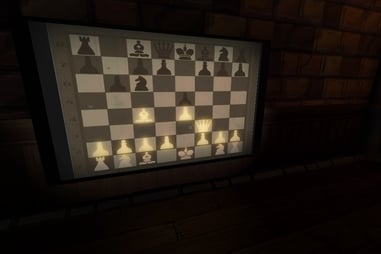
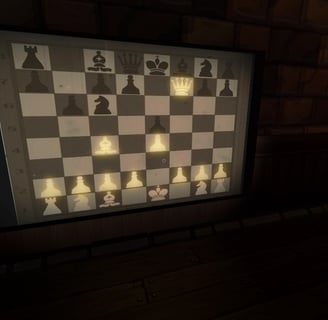
Time to move the chess pieces. Refer to the screenshots by IGGYTRIX below to guide you if you need. First, move the white Pawn (4th from the left and above the King) 2 places forward. Then move the black Pawn directly in front of it forward so that the two Pawns are directly in front of each other.
Next move the white Bishop to your left (the 3rd one from the left in the back row) diagonally 3 spaces to the right. It should be 2 spots to the right of the white pawn.
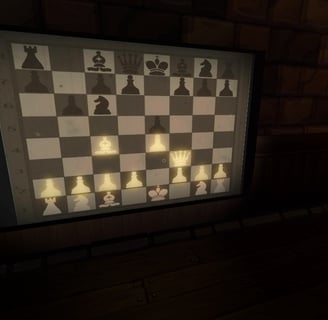
Next move the black Pawn 2nd from the left forward one space.
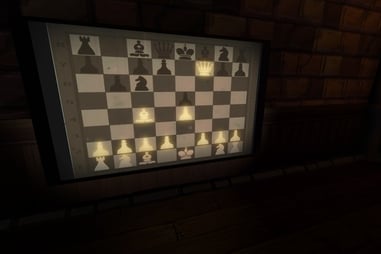
Now move the white Queen (the tallest piece) diagonally left 2 spaces. Then move the black Knight (2nd from the left in the back row) down 1 space and diagonally right one space.
Then finally move the white Queen (the piece you just moved before the black Knight) straight forward all the way on top of the black Pawn in front of it.
This completes the puzzle and unlocks the door.

Dark Hallway
For this puzzle, the Explorer will see a book with some symbols on it. There are a total of 6 possible books that you can get. The Explorer has to tell the Librarian which book he sees and the Librarian then needs to find and open that book to read the instructions on how to proceed.
The Librarian needs to tell the Explorer each step. For example, a step would be "Take one step south.". This isn't very hard, the key is to make sure you communicate the right book.
Haunted Theater:
This is the last puzzle, where the Librarian has to get on the stage and play the recording from the gramophone. BEFORE doing so, make sure you read on ahead so you understand what is going on because once you play the recording, the round will start and there is a timer. If you don't complete it in time, the Jester will kill you.
The goal of this is for the Explorer to bring certain characters to the stage using a set of 6 levers. Starting from the top left going left to right, top to bottom, here is what the levers control. Number 1 doesn't do anything, number 2 controls the castle, number 3 the King, number 4 the Queen, number 5 the Mad King, and number 6 controls People.
There are multiple acts to the play, and you need to bring out certain characters for each act. The first act requires you to bring out the Castle and People so levers 2 and 6. Then when they are out, hit the switch on the right.
The second act needs the Castle, Queen, and King so the Castle is already there, then turn the switch for the People the opposite way to bring it back in. Now bring out the King and Queen by turning levers 3 and 4.
The third act requires you to have the Castle, King, Queen, and People so all you have to do is bring out the People as the rest is already out there.
The fourth act needs the Castle, Queen, People, and Mad King. Take out the King by turning lever 3 to the right and bring out the Mad King by turning lever 5 to the left.
The fifth and final act needs you to turn on the Blood Light and have only the King out. Turn levers 2, 4, 5, and 6 to the right then turn lever 3 to the left and make sure the Blood Light is on then flip the scene lever and that will complete the puzzle.
The Librarian will need to go behind where the props are and interact with the trap door to exit.
The End:
Both of you will be reunited in a final hallway. However, only one of you can escape. One player has to stand on the pressure plate to open the gate while the other escapes.
That is it for this game, if you want to unlock all the achievements, do a second playthrough but switch roles with your friend and make sure you don't die at all for the Die Hard achievement. Also make sure not to mess up on each level to get the Perfect Play achievements for each of them.
